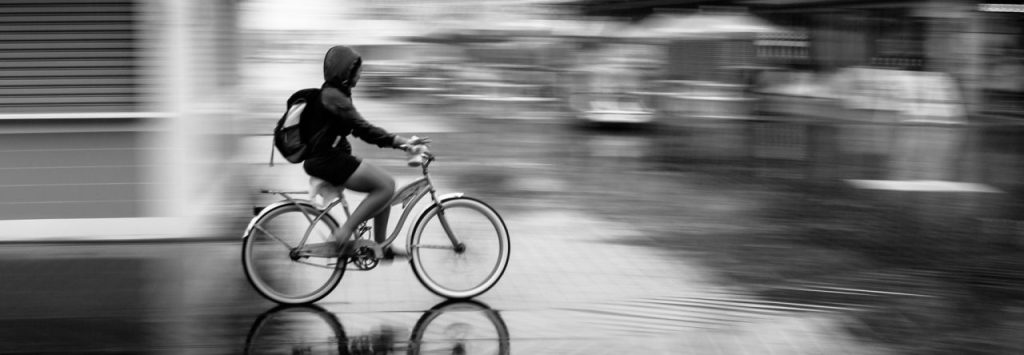
Panning is a fun technique that I have been playing with this summer. The panning effect is achieved by following your subject with a slow shutter speed and capturing the subject as a solid object with the background showing movement. It can be challenging, but with practice you can create very interesting and creative photography.
Background is key.
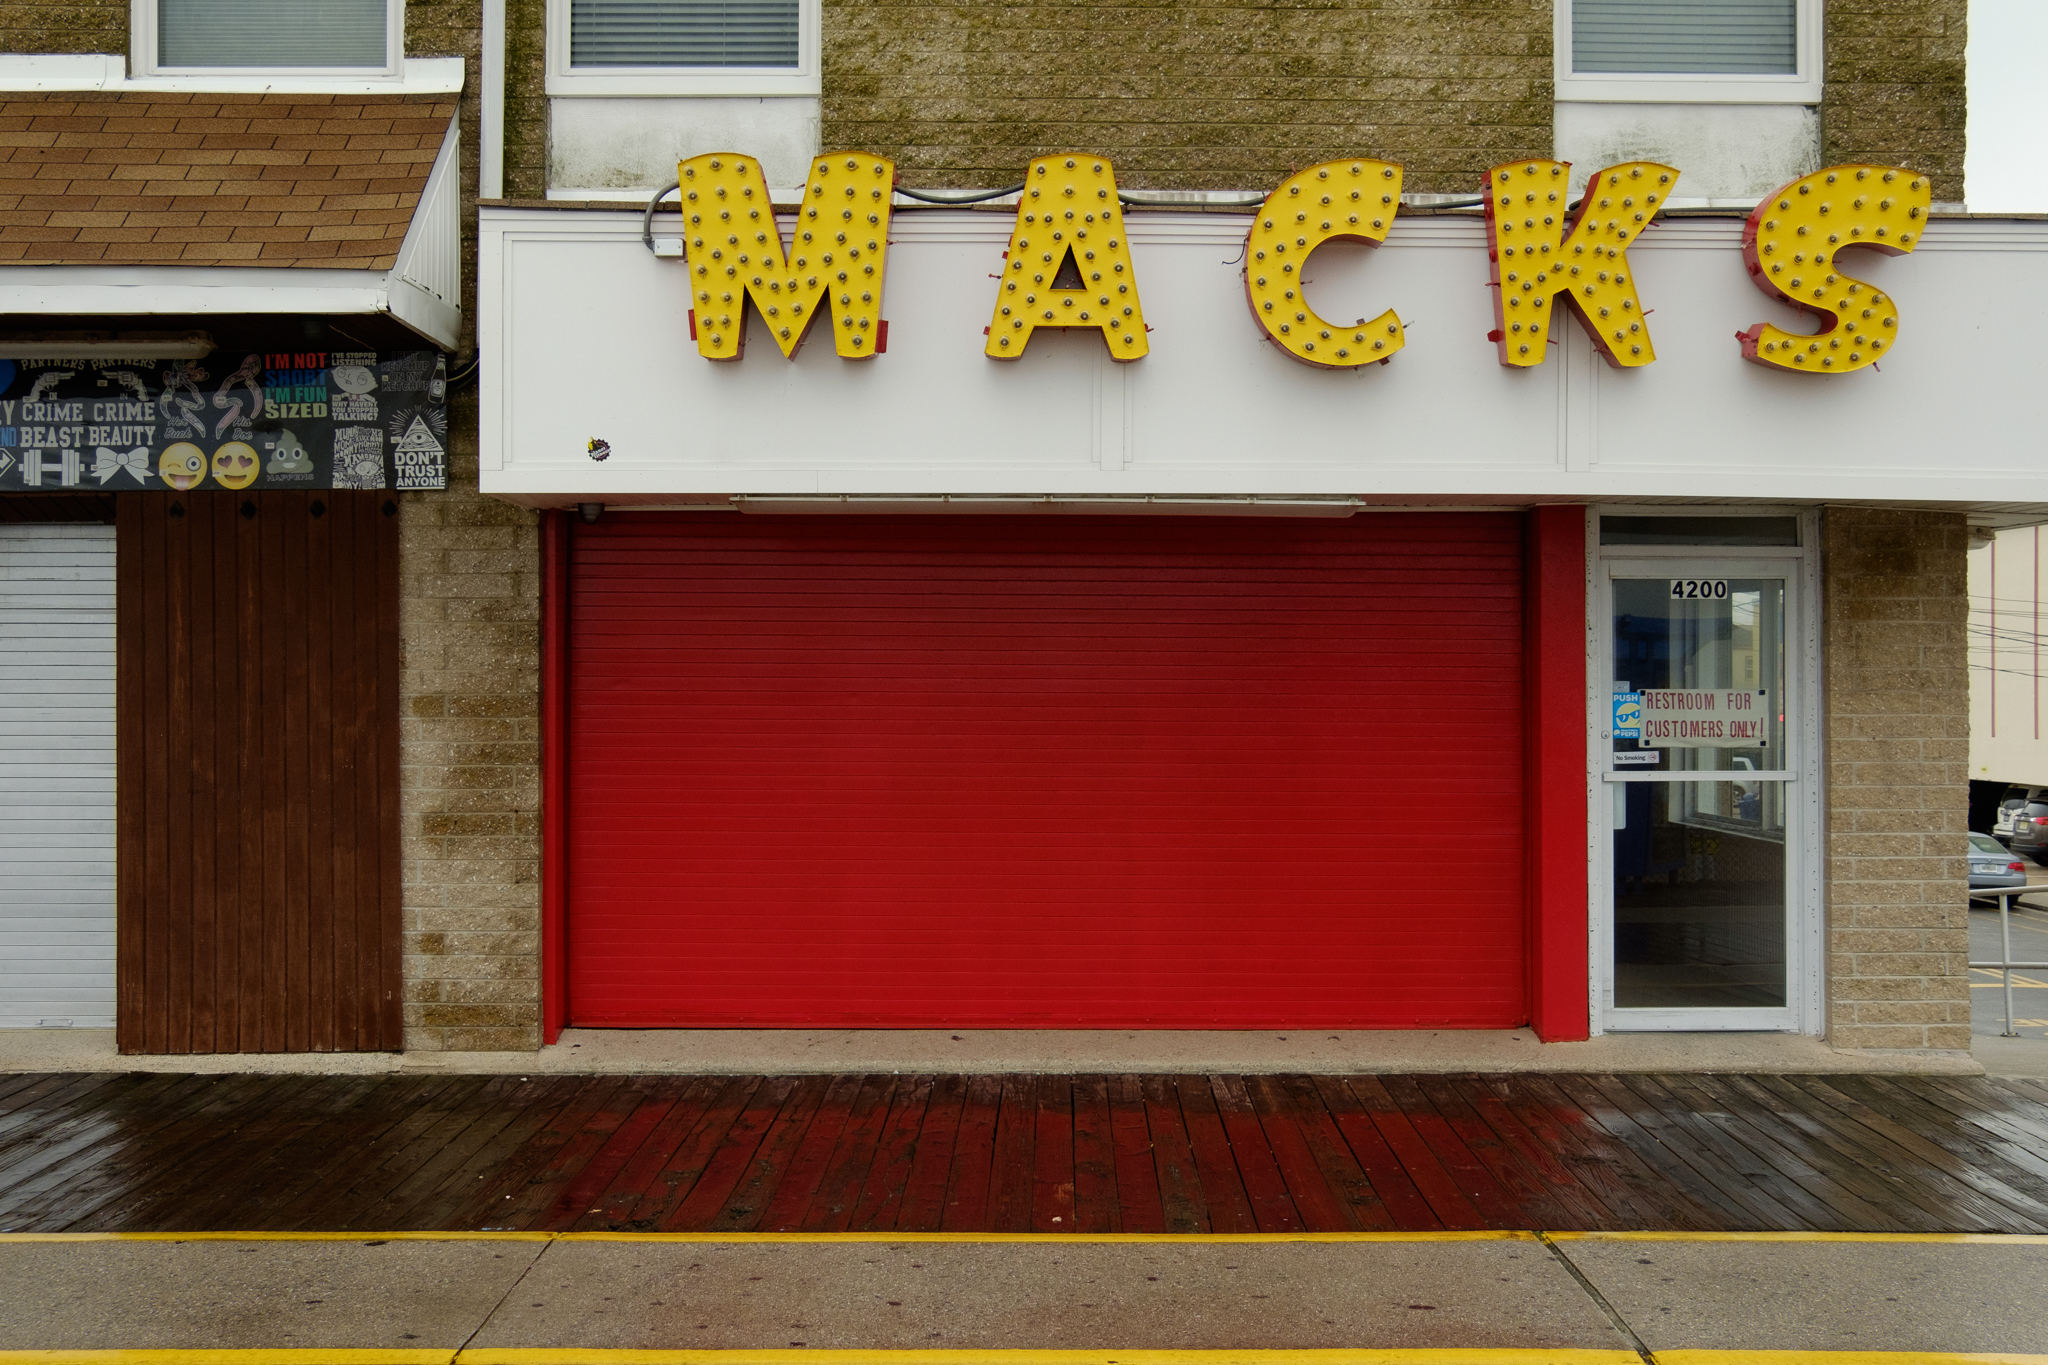
The background you use has a huge effect on the final shot so take some time and look for interesting backgrounds with lines that complement your panning zone.
After finding a good spot to work with I pick some point I can focus on once I acquire a moving subject. My approach to creating a image will be to set my camera’s focus mode to zone and continuous or servo mode while dragging my shutter.
Shooting with my Fuji XT10 and Fuji 18-135 lens lets me shoot wide or with some zoom.


Camera settings.
Aperture priority is the mode I prefer to use. Base ISO will be set to the lowest my camera is capable off. The aperture will be set based on the amount of light present in my scene. If it is a bright sunny day I would consider using a ND filter to help slow my shutter if needed.
In my sample images you can see that I needed F18 to slow my shutter enough to get the desired effect.
Finding the shutter speed that works best will depend on focal distance and the speed you put behind the panning and the moving subject but generally 1/40th of a second will work in most cases.
Location and camera settings are all set, it is time to try panning.
Put yourself into a sturdy balanced stance and using your hips rotate in place following your subject and shoot.
In the examples below my subject entered from my left. The subject in this shot was moving into the shooting area very quickly so the panning was equal to there movement speed.


With practice panning your subjects for effect is a fun and creative way to create some interesting and unique images.


Have a great Labor day and as always any questions or comments are always welcome. Happy photographing and have fun and remember don’t just take photos, make photos!
Ron Phillips

5 responses to “The art of panning.”
Thank you Ron! Super images and a really great explanation of how you achieved the effect.
LikeLike
Thank you so much Katalina!
LikeLike
I enjoyed reading your post. Did you focus on the building and not on the rider/bicycle? I thought you had to track the moving subject. If the building, can you describe the process? Do you focus and set the lens to manual?
I love horses and am constantly trying to take a good pan shot.
Thank you,
Lisa
LikeLiked by 1 person
Hi Lisa, glad you found the information useful.
The image of the building, in this case Macks pizza, is the area or zone for the composition.
Focus is on the rider just before they enter the area and you hold on them in continuous or servo mode and continue to shoot as you move and follow subject as the move through and out of your shooting zone. The goal is to acquire your subject as it enters your zone and with your cameras zone focus combined with continuous or servo mode it will track and hold you subject as you pan your camera along there travel line.
Hope this helps and I would love to see what you get with moving horses!
LikeLike
Thanks v much for the explanation Ron. This is one technique I want to work on!!! I think you just have me a jump start! 😊
Victoria O
LikeLike